 by
by A natural makeup look is one of the most versatile and flattering makeup styles you can wear. It enhances your natural beauty without covering it up, and gives you a fresh and radiant appearance. It’s also perfect for any occasion, whether it’s a casual day out, a formal event, or anything in between.
However, achieving a natural makeup look is not as easy as it seems. It requires some skill and knowledge to choose the right products, colors, and techniques that will suit your skin type, tone, and features. It also requires some practice and patience to apply them in a way that will create a seamless and flawless finish.
In this article, we’ll show you how to achieve a natural makeup look in 5 easy steps. We’ll also introduce you to some of the best products, tips, and tricks that will help you master this makeup style. By the end of this article, you’ll be able to create a natural makeup look that will make you look and feel beautiful.
Step 1: Prep Your Skin
The first and most important step to achieve a natural makeup look is to prep your skin. This means cleansing, moisturizing, and priming your skin before applying any makeup. This will ensure that your skin is clean, hydrated, and smooth, and that your makeup will glide on easily and last longer.
Cleanse
Cleansing your skin is essential to remove any dirt, oil, or makeup residue that may clog your pores or cause breakouts. It also helps to refresh and balance your skin’s pH level, and prepare it for the next steps.
To cleanse your skin, you can use a gentle cleanser that suits your skin type. For example:
- If you have dry or sensitive skin, you can use a cream or milk cleanser that will nourish and soothe your skin without stripping it of its natural oils.
- If you have oily or combination skin, you can use a gel or foam cleanser that will remove excess oil and impurities without drying out your skin.
- If you have normal skin, you can use any type of cleanser that will cleanse your skin effectively without irritating it.
To use a cleanser, you can follow these steps:
- Wet your face with lukewarm water.
- Apply a small amount of cleanser on your palm or a cotton pad.
- Massage the cleanser gently on your face in circular motions, avoiding the eye area.
- Rinse off the cleanser with lukewarm water.
- Pat your face dry with a soft towel.
Moisturize
Moisturizing your skin is essential to replenish any moisture that may have been lost during cleansing, and to provide a protective barrier against environmental factors that may damage your skin. It also helps to plump up and smooth out your skin, and to create a dewy and healthy glow.
To moisturize your skin, you can use a hydrating moisturizer that suits your skin type. For example:
- If you have dry or sensitive skin, you can use a rich or creamy moisturizer that will deeply hydrate and nourish your skin without clogging your pores or causing breakouts.
- If you have oily or combination skin, you can use a light or gel moisturizer that will lightly hydrate and balance your skin without making it greasy or shiny.
- If you have normal skin, you can use any type of moisturizer that will moisturize your skin effectively without weighing it down or irritating it.
To use a moisturizer, you can follow these steps:
- Apply a pea-sized amount of moisturizer on your palm or fingertips.
- Dot the moisturizer on your forehead, cheeks, nose, chin, and neck.
- Gently spread the moisturizer over your face and neck in upward strokes, avoiding the eye area.
- Wait for a few minutes until the moisturizer is fully absorbed into your skin.
Prime
Priming your skin is optional but recommended to enhance the performance and appearance of your makeup. It helps to smooth out any imperfections, such as pores, fine lines, or uneven texture, and to create a smooth and even base for your makeup. It also helps to extend the wear and longevity of your makeup, and to prevent it from creasing, fading, or smudging throughout the day.
To prime your skin, you can use a smoothing primer that suits your skin concern. For example:
- If you have large pores or oily skin, you can use a pore-minimizing or mattifying primer that will reduce the appearance of your pores and control your oil production.
- If you have dry or dull skin, you can use a hydrating or illuminating primer that will moisturize and brighten your skin.
- If you have redness or uneven skin tone, you can use a color-correcting or tinted primer that will neutralize and even out your skin tone.
To use a primer, you can follow these steps:
- Apply a pea-sized amount of primer on your palm or fingertips.
- Dot the primer on your forehead, cheeks, nose, chin, and any other areas where you need it.
- Gently blend the primer over your face with your fingers or a sponge, focusing on the areas where you have any imperfections or concerns.
- Wait for a few minutes until the primer is fully dry and set on your skin.
Step 2: Apply Your Base
The second step to achieve a natural makeup look is to apply your base. This means applying your foundation, concealer, and powder to create a flawless and even complexion. This will also help to conceal any blemishes, dark circles, or other imperfections that may show through your natural makeup look.
Foundation
Foundation is the most important part of your base, as it will create the canvas for the rest of your makeup. It will also help to even out your skin tone, cover any imperfections, and enhance your natural beauty.
To apply your foundation, you need to choose the right foundation for your skin tone and undertone. Your skin tone is the color of your skin, while your undertone is the subtle hue that underlies your skin tone. Your undertone can be cool (pinkish), warm (yellowish), or neutral (neither).
To choose the right foundation for your skin tone and undertone, you can follow these tips:
- Match the foundation to your jawline or neck, not your hand or wrist. This will ensure that the foundation will blend seamlessly with your face and body, and avoid any mismatch or demarcation lines.
- Test the foundation in natural light, not artificial light. This will ensure that the foundation will look natural and true to color in different lighting conditions, and avoid any oxidation or color change.
- Choose a foundation that matches or complements your undertone, not contrasts with it. This will ensure that the foundation will flatter and harmonize with your natural features, and avoid any ashy or orangey appearance.
To apply your foundation, you can use a lightweight foundation that has a natural finish. This will ensure that the foundation will look like your skin but better, and not cakey or heavy.
To use a lightweight foundation, you can follow these steps:
- Apply a small amount of foundation on the back of your hand or a palette.
- Dot the foundation on your forehead, cheeks, nose, chin, and any other areas where you need coverage.
- Blend the foundation over your face with a sponge, brush, or fingers, using dabbing or buffing motions. Start from the center of your face and work outwards, blending well along the hairline, jawline, and ears.
- Build up the coverage as needed, but avoid applying too much foundation. Less is more when it comes to a natural makeup look.
Concealer
Concealer is an optional but helpful part of your base, as it will help to conceal any blemishes or dark circles that may show through your foundation. It will also help to brighten and highlight certain areas of your face, such as under your eyes, around your nose, or on your chin.
To apply your concealer, you need to choose the right concealer for your skin tone and concern. Your skin tone is the color of your skin, while your concern is the type of imperfection you want to conceal.
To choose the right concealer for your skin tone and concern, you can follow these tips:
- Choose a concealer that matches or is slightly lighter than your skin tone for blemishes or redness. This will help to camouflage and neutralize them without drawing attention to them.
- Choose a concealer that is one or two shades lighter than your skin tone for dark circles or dullness. This will help to brighten and illuminate them without looking unnatural or cakey.
- Choose a concealer that has a creamy or liquid texture for a natural and blendable finish. This will help to avoid any creasing or cracking on your skin.
To apply your concealer, you can use a creamy concealer that has a natural finish. This will ensure that the concealer will look like your skin but better, and not cakey or heavy.
To use a creamy concealer, you can follow these steps:
- Apply a small amount of concealer on the back of your hand or a palette.
- Dot the concealer on the areas where you need coverage, such as under your eyes, around your nose, on your chin, or on any blemishes.
- Blend the concealer over your skin with a sponge, brush, or fingers, using dabbing or tapping motions. Avoid rubbing or dragging the concealer, as this will remove it or make it look patchy.
- Set the concealer with a powder if needed, but avoid applying too much powder. A light dusting of powder will help to prevent creasing or fading, but too much powder will make your skin look dry or cakey.
Powder
Powder is an optional but helpful part of your base, as it will help to set your foundation and concealer and make them last longer. It will also help to mattify your skin and reduce any shine or oiliness that may occur throughout the day.
To apply your powder, you need to choose the right powder for your skin type and finish. Your skin type is the condition of your skin, while your finish is the appearance you want to achieve with your powder.
To choose the right powder for your skin type and finish, you can follow these tips:
- Choose a loose or pressed powder that matches or is slightly lighter than your skin tone for a natural and seamless finish. This will help to avoid any flashback or white cast on your skin.
- Choose a translucent or colorless powder for a matte or dewy finish. This will help to set your makeup without adding any color or coverage to your skin.
- Choose a powder that suits your skin type. For example:
- If you have dry or normal skin, you can use a hydrating or luminous powder that will moisturize and brighten your skin without making it look cakey or powdery.
- If you have oily or combination skin, you can use a mattifying or oil-absorbing powder that will control and reduce your oil production without making it look dry or flat.
To apply your powder, you can use a translucent powder that has a natural finish. This will ensure that the powder will look like your skin but better, and not cakey or heavy.
To use a translucent powder, you can follow these steps:
- Apply a small amount of powder on a fluffy brush or a puff.
- Tap off any excess powder from the brush or puff.
- Lightly dust the powder over your face, focusing on the areas where you need to set your makeup, such as under your eyes, around your nose, on your chin, or on any oily zones.
- Avoid applying too much powder, as this will make your skin look dry or cakey. A light layer of powder will help to prevent creasing or fading, but too much powder will make your skin look dull or aged.
Step 3: Enhance Your Features
The third step to achieve a natural makeup look is to enhance your features. This means adding some warmth, color, and glow to your face with bronzer, blush, and highlighter. This will also help to define and sculpt your face shape, and to create a healthy and radiant appearance.
Bronzer
Bronzer is an optional but helpful part of your makeup, as it will help to add some warmth and dimension to your face. It will also help to create a sun-kissed and natural look, as if you just came back from a vacation.
To apply your bronzer, you need to choose the right bronzer for your skin tone and undertone. Your skin tone is the color of your skin, while your undertone is the subtle hue that underlies your skin tone. Your undertone can be cool (pinkish), warm (yellowish), or neutral (neither).
To choose the right bronzer for your skin tone and undertone, you can follow these tips:
- Choose a bronzer that is one or two shades darker than your skin tone for a natural and seamless look. This will help to avoid any orange or muddy appearance on your skin.
- Choose a bronzer that matches or complements your undertone for a flattering and harmonious look. This will help to avoid any ashy or grayish appearance on your skin.
- Choose a bronzer that has a matte or shimmer finish depending on your preference and occasion. A matte bronzer will create a more subtle and natural look, while a shimmer bronzer will create a more glamorous and festive look.
To apply your bronzer, you can use a natural-looking bronzer that has a matte or shimmer finish. This will ensure that the bronzer will look like your skin but better, and not cakey or heavy.
To use a bronzer, you can follow these steps:
- Apply a small amount of bronzer on a fluffy brush or a fan brush.
- Tap off any excess bronzer from the brush.
- Lightly sweep the bronzer over the areas where the sun would naturally hit your face, such as your forehead, temples, cheekbones, nose, chin, and jawline.
- Avoid applying too much bronzer, as this will make your face look dirty or unnatural. A light layer of bronzer will help to warm up and contour your face, but too much bronzer will make your face look flat or orange.
Blush
Blush is an optional but helpful part of your makeup, as it will help to add some color and glow to your cheeks. It will also help to create a healthy and youthful look, as if you just blushed or flushed naturally.
To apply your blush, you need to choose the right blush for your skin tone and undertone. Your skin tone is the color of your skin, while your undertone is the subtle hue that underlies your skin tone. Your undertone can be cool (pinkish), warm (yellowish), or neutral (neither).
To choose the right blush for your skin tone and undertone, you can follow these tips:
- Choose a blush that matches or complements your natural flush for a natural and seamless look. This will help to avoid any clownish or unnatural appearance on your cheeks.
- Choose a blush that matches or complements your undertone for a flattering and harmonious look. This will help to avoid any washed-out or dull appearance on your cheeks.
- Choose a blush that has a matte or shimmer finish depending on your preference and occasion. A matte blush will create a more subtle and natural look, while a shimmer blush will create a more glamorous and festive look.
To apply your blush, you can use a flattering blush that has a matte or shimmer finish. This will ensure that the blush will look like your skin but better, and not cakey or heavy.
To use a blush, you can follow these steps:
- Apply a small amount of blush on a fluffy brush or a stippling brush.
- Tap off any excess blush from the brush.
- Lightly dab the blush on the apples of your cheeks, blending upwards towards your temples.
- Avoid applying too much blush, as this will make your face look overdone or unnatural. A light layer of blush will help to add some color and glow to your cheeks, but too much blush will make your face look red or bruised.
Highlighter
Highlighter is an optional but helpful part of your makeup, as it will help to add some shine and radiance to your high points. It will also help to create a dewy and healthy look, as if you just glowed naturally.
To apply your highlighter, you need to choose the right highlighter for your skin tone and undertone. Your skin tone is the color of your skin, while your undertone is the subtle hue that underlies your skin tone. Your undertone can be cool (pinkish), warm (yellowish), or neutral (neither).
To choose the right highlighter for your skin tone and undertone, you can follow these tips:
- Choose a highlighter that matches or complements your skin tone for a natural and seamless look. This will help to avoid any frosty or dark appearance on your skin.
- Choose a highlighter that matches or complements your undertone for a flattering and harmonious look. This will help to avoid any clashy or mismatched appearance on your skin.
- Choose a highlighter that has a subtle or intense finish depending on your preference and occasion. A subtle highlighter will create a more natural and soft look,
while an intense highlighter will create a more glamorous and dramatic look.
To apply your highlighter, you can use a subtle highlighter that has a natural finish. This will ensure that the highlighter will look like your skin but better, and not cakey or heavy.
To use a highlighter, you can follow these steps:
- Apply a small amount of highlighter on a fan brush or a finger.
- Tap off any excess highlighter from the brush or finger.
- Lightly sweep the highlighter over the areas where the light would naturally hit your face, such as your cheekbones, brow bones, nose bridge, cupid’s bow, and chin.
- Avoid applying too much highlighter, as this will make your face look oily or unnatural. A light layer of highlighter will help to add some shine and radiance to your face, but too much highlighter will make your face look greasy or glittery.
Step 4: Define Your Eyes
The fourth step to achieve a natural makeup look is to define your eyes. This means filling in and shaping your eyebrows, applying a neutral eyeshadow, applying a thin eyeliner, and applying a coat of mascara. This will also help to frame and enhance your eye color and shape, and to create a bright and awake look.
Eyebrows
Eyebrows are an important part of your makeup, as they will help to frame and balance your face. They will also help to express your emotions and personality, and to create a natural and polished look.
To define your eyebrows, you need to choose the right eyebrow product for your brow shape and color. Your brow shape is the natural shape of your eyebrows, while your brow color is the natural color of your eyebrow hairs.
To choose the right eyebrow product for your brow shape and color, you can follow these tips:
- Choose an eyebrow product that matches or is slightly darker than your brow color for a natural and seamless look. This will help to avoid any unnatural or harsh appearance on your brows.
- Choose an eyebrow product that suits your brow shape and preference. For example:
- If you have sparse or thin brows, you can use an eyebrow pencil or powder that will fill in and define your brows with precise strokes or soft shading.
- If you have full or thick brows, you can use an eyebrow gel or pomade that will tame and shape your brows with flexible hold or strong grip.
- If you have normal or average brows, you can use any type of eyebrow product that will enhance and refine your brows with ease and control.
To define your eyebrows, you can use an easy-to-use eyebrow product that has a natural finish. This will ensure that the eyebrow product will look like your brows but better, and not cakey or heavy.
To use an eyebrow product, you can follow these steps:
- Brush your brows with a spoolie brush or an eyebrow comb to groom them and remove any excess product or dirt.
- Outline the shape of your brows with the eyebrow product of your choice, following the natural arch and length of your brows. Start from the inner corner and work outwards, using light and short strokes or sweeps.
- Fill in any gaps or sparse areas with the eyebrow product of your choice, using the same technique as above. Avoid overfilling or overdrawing your brows, as this will make them look unnatural or cartoonish.
- Blend the product with a spoolie brush or an eyebrow comb to create a smooth and even finish. Avoid blending too much or too little, as this will make your brows look patchy or harsh.
- Set your brows with a clear or tinted brow gel or wax if needed, to keep them in place and add some shine and texture.
Eyeshadow
Eyeshadow is an optional but helpful part of your makeup, as it will help to add some depth and dimension to your eyes. It will also help to enhance and contrast with your eye color and shape, and to create a soft and natural look.
To apply your eyeshadow, you need to choose the right eyeshadow for your eye color and shape. Your eye color is the color of your iris, while your eye shape is the shape of your eye and eyelid.
To choose the right eyeshadow for your eye color and shape, you can follow these tips:
- Choose an eyeshadow that matches or complements your eye color for a natural and seamless look. This will help to avoid any clashy or dull appearance on your eyes.
- Choose an eyeshadow that suits your eye shape and preference. For example:
- If you have small or hooded eyes, you can use a light or shimmery eyeshadow that will open up and brighten your eyes with some sparkle or shine.
- If you have large or round eyes, you can use a dark or matte eyeshadow that will define and contour your eyes with some depth or drama.
- If you have almond or monolid eyes, you can use any type of eyeshadow that will enhance and accentuate your eyes with some color or contrast.
To apply your eyeshadow, you can use a neutral eyeshadow that has a natural finish. This will ensure that the eyeshadow will look like your eyes but better, and not cakey or heavy.
To use an eyeshadow, you can follow these steps:
- Apply a small amount of eyeshadow on a flat shader brush or a finger.
- Tap off any excess eyeshadow from the brush or finger.
- Lightly sweep the eyeshadow over your eyelid, starting from the inner corner and blending outwards. You can also apply the eyeshadow on your lower lash line if you want to create more definition or balance.
- Avoid applying too much eyeshadow, as this will make your eyes look overdone or unnatural. A light layer of eyeshadow will help to add some depth and dimension to your eyes, but too much eyeshadow will make your eyes look heavy or dark.
Eyeliner
Eyeliner is an optional but helpful part of your makeup, as it will help to add some definition and contrast to your lash line. It will also help to make your eyes pop and stand out, and to create a sharp and natural look.
To apply your eyeliner, you need to choose the right eyeliner for your eye shape and preference. Your eye shape is the shape of your eye and eyelid, while your preference is the type of eyeliner you want to use.
To choose the right eyeliner for your eye shape and preference, you can follow these tips:
- Choose an eyeliner that suits your eye shape and preference. For example:
- If you have small or hooded eyes, you can use a pencil or gel eyeliner that will create a thin and precise line on your lash line without smudging or transferring.
- If you have large or round eyes, you can use a liquid or pen eyeliner that will create a thick and dramatic line on your lash line with some wing or flick.
- If you have almond or monolid eyes, you can use any type of eyeliner that will create a smooth and even line on your lash line with some curve or lift.
- Choose an eyeliner that has a long-lasting and smudge-proof formula for a natural and flawless look. This will help to avoid any fading or smearing on your eyes.
To apply your eyeliner, you can use a long-lasting eyeliner that has a natural finish. This will ensure that the eyeliner will look like your eyes but better, and not cakey or heavy.
To use an eyeliner, you can follow these steps:
- Apply a small amount of eyeliner on the tip of the applicator or brush.
- Start from the inner corner of your eye and draw a thin line along your upper lash line, following the natural shape of your eye. You can also draw a thin line along your lower lash line if you want to create more definition or balance.
- Extend the line slightly beyond the outer corner of your eye if you want to create a wing or flick. You can also curve the line slightly upwards if you want to create a lift or cat-eye effect.
- Avoid applying too much eyeliner, as this will make your eyes look overdone or unnatural. A thin layer of eyeliner will help to add some definition and contrast to your eyes, but too much eyeliner will make your eyes look heavy or dark.
Mascara
Mascara is an optional but helpful part of your makeup, as it will help to add some length and volume to your lashes. It will also help to open up and brighten your eyes, and to create a full and natural look.
To apply your mascara, you need to choose the right mascara for your lash type and preference. Your lash type is the condition of your natural lashes, while your preference is the type of mascara you want to use.
To choose the right mascara for your lash type and preference, you can follow these tips:
- Choose a mascara that suits your lash type and preference. For example:
- If you have short or sparse lashes, you can use a lengthening or volumizing mascara that will extend and thicken your lashes with some fibers or polymers.
- If you have long or full lashes, you can use a curling or defining mascara that will lift and separate your lashes with some wax or resin.
- If you have normal or average lashes, you can use any type of mascara that will enhance and accentuate your lashes with some color or formula.
- Choose a mascara that has a long-lasting and smudge-proof formula for a natural and flawless look. This will help to avoid any flaking or smearing on your eyes.
To apply your mascara, you can use a clump-free mascara that has a natural finish. This will ensure that the mascara will look like your lashes but better, and not cakey or heavy.
To use a mascara, you can follow these steps:
- Curl your lashes with an eyelash curler if needed, to create some lift and curl. This will also help to open up and brighten your eyes.
- Apply a small amount of mascara on the wand or brush.
- Wiggle the wand or brush from the roots to the tips of your upper lashes, coating them evenly with the product. You can also apply the product on your lower lashes if you want to create more definition or balance.
- Avoid applying too much mascara, as this will make your lashes look overdone or unnatural. A coat of mascara will help to add some length and volume to your lashes, but too much mascara will make your lashes look clumpy or spidery.
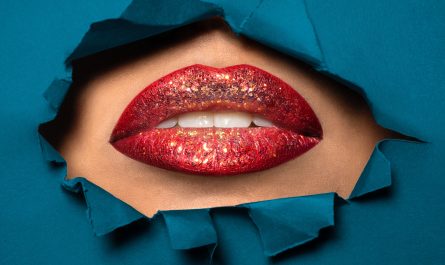
Step 5: Finish Your Lips
The fifth and final step to achieve a natural makeup look is to finish your lips. This means moisturizing your lips before applying any lip product, and choosing a lip product that matches or complements your natural lip color. This will also help to complete and balance your makeup look, and to create a soft and natural look.
Lip Balm
Lip balm is an essential part of your makeup, as it will help to moisturize and nourish your lips before applying any lip product. It will also help to prevent any dryness, chapping, or cracking on your lips, and to create a smooth and healthy base for your lip product.
To apply your lip balm, you need to choose the right lip balm for your lip condition and preference. Your lip condition is the condition of your natural lips, while your preference is the type of lip balm you want to use.
To choose the right lip balm for your lip condition and preference, you can follow these tips:
- Choose a lip balm that suits your lip condition and preference. For example:
- If you have dry or chapped lips, you can use a hydrating or healing lip balm that will moisturize and repair your lips with some ingredients like shea butter, beeswax, or lanolin.
- If you have normal or healthy lips, you can use any
type of lip balm that will maintain and protect your lips with some ingredients like vitamin E, aloe vera, or coconut oil. - Choose a lip balm that has a clear or tinted finish depending on your preference and occasion. A clear lip balm will create a more natural and subtle look, while a tinted lip balm will create a more colorful and festive look.
To apply your lip balm, you can use a nourishing lip balm that has a clear or tinted finish. This will ensure that the lip balm will look like your lips but better, and not cakey or heavy.
To use a lip balm, you can follow these steps:
- Apply a small amount of lip balm on your finger or directly from the tube or stick.
- Swipe the lip balm over your upper and lower lips, covering them evenly with the product.
- Press your lips together to distribute the product and smooth out any lines or wrinkles.
- Reapply the lip balm as needed throughout the day to keep your lips moisturized and nourished.
Lipstick or Gloss
Lipstick or gloss is an optional but helpful part of your makeup, as it will help to add some color and shine to your lips. It will also help to complement and contrast with your natural makeup look, and to create a soft and natural look.
To apply your lipstick or gloss, you need to choose the right lipstick or gloss for your skin tone and undertone. Your skin tone is the color of your skin, while your undertone is the subtle hue that underlies your skin tone. Your undertone can be cool (pinkish), warm (yellowish), or neutral (neither).
To choose the right lipstick or gloss for your skin tone and undertone, you can follow these tips:
- Choose a lipstick or gloss that matches or complements your natural lip color for a natural and seamless look. This will help to avoid any unnatural or harsh appearance on your lips.
- Choose a lipstick or gloss that matches or complements your undertone for a flattering and harmonious look. This will help to avoid any washed-out or dull appearance on your lips.
- Choose a lipstick or gloss that has a sheer or glossy finish for a natural and soft look. This will help to avoid any matte or opaque appearance on your lips.
To apply your lipstick or gloss, you can use a sheer or glossy lipstick or gloss that has a natural finish. This will ensure that the lipstick or gloss will look like your lips but better, and not cakey or heavy.
To use a lipstick or gloss, you can follow these steps:
- Apply a small amount of lipstick or gloss on your finger or directly from the tube or wand.
- Swipe the lipstick or gloss over your upper and lower lips, covering them evenly with the product.
- Press your lips together to distribute the product and smooth out any lines or wrinkles.
- Reapply the lipstick or gloss as needed throughout the day to keep your lips colorful and shiny.
Conclusion
A natural makeup look is one of the most versatile and flattering makeup styles you can wear. It enhances your natural beauty without covering it up, and gives you a fresh and radiant appearance. It’s also perfect for any occasion, whether it’s a casual day out, a formal event, or anything in between.
To achieve a natural makeup look, you can follow these five easy steps:
- Prep your skin with cleanser, moisturizer, and primer.
- Apply your base with foundation, concealer, and powder.
- Enhance your features with bronzer, blush, and highlighter.
- Define your eyes with eyebrows, eyeshadow, eyeliner, and mascara.
- Finish your lips with lip balm, lipstick, or gloss.
By following these steps, you’ll be able to create a natural makeup look that will make you look and feel beautiful.
FAQs
Here are some frequently asked questions and answers related to the topic of the article:
How to choose the best makeup brushes for a natural makeup look?
To choose the best makeup brushes for a natural makeup look, you can follow these tips:
- Choose synthetic or cruelty-free brushes that are soft and gentle on your skin, and easy to clean and maintain.
- Choose brushes that have different shapes and sizes that will suit different products and areas of your face. For example:
- A flat shader brush or a finger for eyeshadow.
- A fluffy brush or a fan brush for bronzer, blush, and highlighter.
- A spoolie brush or an eyebrow comb for eyebrows.
- A sponge, brush, or fingers for foundation, concealer, and powder.
- Choose brushes that have good quality and durability that will last long and perform well.
How to make your natural makeup look last longer?
To make your natural makeup look last longer, you can follow these tips:
- Use a primer before applying your makeup, as it will help to smooth out your skin, create a smooth and even base for your makeup, and extend the wear and longevity of your makeup.
- Use a setting spray or powder after applying your makeup, as it will help to lock in your makeup, prevent it from creasing, fading, or smudging throughout the day, and give it a natural and flawless finish.
- Use long-lasting and smudge-proof products, as they will help to resist any oil, sweat, or humidity that may affect your makeup, and keep it looking fresh and vibrant all day long.
- Touch up your makeup as needed throughout the day, as it will help to refresh and revive your makeup, and keep it looking natural and beautiful.
How to remove your natural makeup look?
To remove your natural makeup look, you can follow these tips:
- Use a gentle and effective makeup remover that will dissolve and wipe away your makeup without irritating or drying out your skin. You can use a micellar water, a cleansing oil, a cleansing balm, or a makeup wipe, depending on your preference and convenience.
- Use a mild and moisturizing cleanser that will cleanse and nourish your skin without stripping or dehydrating it. You can use a cream, gel, foam, or milk cleanser, depending on your skin type and condition.
- Use a soft and damp cloth or cotton pad to apply and remove your makeup remover and cleanser, using gentle and circular motions. Avoid rubbing or tugging your skin, as this will cause damage or irritation to your skin.
- Rinse your face with lukewarm water and pat it dry with a clean and soft towel. Avoid using hot or cold water, as this will cause redness or tightness to your skin.
- Apply a toner, serum, moisturizer, and eye cream to hydrate and replenish your skin after removing your makeup. This will help to restore your skin’s natural balance and glow, and prepare it for the next day.