 by
by Do you love having beautiful and well-groomed nails but hate spending money and time at the salon? If so, you might want to try doing a manicure at home. A DIY manicure can save you a lot of money in the long run, as well as give you more freedom to choose your own colors and styles. Plus, it can be a fun and relaxing activity that you can do by yourself or with your friends.
In this article, we will show you how to do a basic manicure at home with simple tools and products that you probably already have or can easily buy. We will also give you some tips on how to make your manicure look professional and last longer.
What You Need for a DIY Manicure
Before you start your manicure, make sure you have everything you need on hand. Here are the essential tools and products for a basic manicure:
- Nail polish remover
- Cotton balls
- Nail clippers
- Nail file
- Nail buffer
- Cuticle pusher or orange stick
- Cuticle oil or hand cream
- Base coat
- Nail polish
- Top coat
You can also use some optional items to enhance your manicure, such as:
- Nail lamp (if you use gel polish)
- Nail stickers or decals
- Nail art tools (such as dotting pens or brushes)
- Nail dryer spray or drops
How to Prep Your Nails for a Manicure
The first step of doing a manicure at home is to prepare your nails for the polish. This will ensure that your nails are clean, smooth, and healthy. Follow these steps to prep your nails:
- Remove any old polish from your nails with nail polish remover and cotton balls. If you have acrylics or gels that you want to remove, follow the instructions on the product packaging or consult a professional.
- Wash your hands with soap and water and dry them thoroughly. This will remove any dirt, oil, or residue from your nails.
- Trim your nails to the length and shape you want with nail clippers. Longer nails are more prone to breaking and chipping, so you might want to keep them short and practical. However, don’t trim them too short either; leave some white part of your nail visible beyond your fingertip.
- File your nails with a nail file to smooth out any rough edges and create a uniform shape. You can choose between square or oval tips, depending on your preference. For square tips, file your nails straight across with rounded corners. For oval tips, file your nails into gently curved shapes that taper at the ends.
- Buff your nails with a nail buffer to remove any ridges or bumps and create a smooth surface for the polish. Use the coarsest side of the buffer first, then the medium side, then the finest side. Don’t buff too hard or too much; this can weaken your nails and make them more brittle.
- Push back your cuticles with a cuticle pusher or an orange stick. Cuticles are the thin skin that covers the base of your nail. Pushing them back will make your nails look longer and neater. Don’t cut your cuticles; this can cause infections and damage your nail growth.
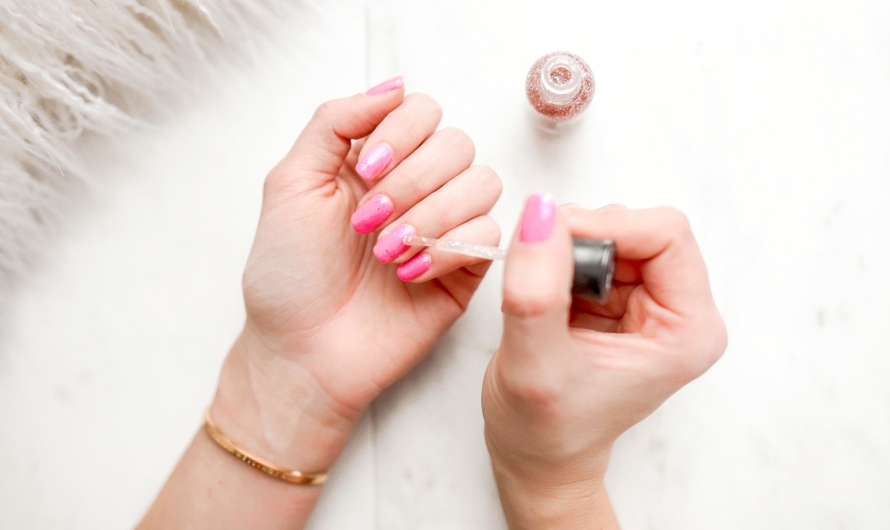
How to Apply Nail Polish Like a Pro
Now that your nails are ready, it’s time to apply the polish. This is the most fun and creative part of doing a manicure at home, but also the most challenging. Here are some tips on how to apply nail polish like a pro:
- Apply a thin layer of base coat on your nails. A base coat is a clear polish that protects your nails from staining and helps the color polish adhere better. Start from the cuticle and work your way up to the tip with smooth and even strokes. Let the base coat dry for about 2 minutes.
- Apply a thin layer of color polish on your nails. Choose a color that suits your mood, outfit, or occasion. You can also mix and match different colors or create patterns with nail stickers or decals. Start from the cuticle and work your way up to the tip with smooth and even strokes. Don’t overload your brush with too much polish; this can cause bubbles and smudges. Let the color polish dry for about 2 minutes.
- Repeat step 2 until you reach your desired opacity. Depending on the quality and pigmentation of your polish, you might need two or three coats to achieve full coverage. Make sure each coat is dry before applying the next one.
- Apply a thin layer of top coat on your nails. A top coat is a clear polish that seals in your color and adds shine and durability to your manicure. Start from the cuticle and work your way up to the tip with smooth and even strokes. Let the top coat dry for about 2 minutes.
If you use gel polish, you will need to cure each layer under a nail lamp for about 30 seconds. Gel polish is more long-lasting and chip-resistant than regular polish, but also more difficult to remove.
To avoid smudging or denting your polish, be careful not to touch anything with your nails until they are completely dry. You can use a nail dryer spray or drops to speed up the drying process.
How to Make Your Manicure Last Longer
A DIY manicure can look great for a few days, but it can also start to chip or peel off sooner than you’d like. To make your manicure last longer, follow these tips:
- Wear gloves when doing household chores that involve water, heat, or chemicals, such as washing dishes, gardening, or cleaning. These can damage your polish and weaken your nails.
- Apply cuticle oil or hand cream to your nails and cuticles every day. This will moisturize your nails and prevent them from drying out and cracking.
- Reapply top coat every few days to refresh your shine and protect your color.
- Avoid biting or picking at your nails or cuticles. This can ruin your manicure and harm your nail health.
Conclusion
Doing a manicure at home is a great way to save money and have fun with your nails. With some basic tools and products, you can create a beautiful and professional-looking manicure in the comfort of your own home.
All you need to do is prep your nails, apply nail polish, and make it last longer. You can also experiment with different colors, styles, and designs to suit your personality and mood.
So what are you waiting for? Grab your nail kit and start pampering yourself with a DIY manicure today!
FAQs
Q: How often should I do a manicure at home?
A: It depends on how fast your nails grow and how well you take care of them. Generally, you should do a manicure at home every one or two weeks to keep your nails looking neat and healthy.
Q: How do I remove gel polish at home?
A: Gel polish is more difficult to remove than regular polish because it adheres strongly to your nails. To remove gel polish at home, you will need acetone-based nail polish remover, cotton balls, aluminum foil, and a wooden stick or cuticle pusher.
- Soak a cotton ball in acetone-based nail polish remover and place it over your nail.
- Wrap a piece of aluminum foil around your finger to secure the cotton ball in place.
- Repeat for all 10 fingers.
- Wait for about 15 minutes for the gel polish to soften.
- Unwrap each finger and gently scrape off the gel polish with a wooden stick or cuticle pusher.
- Buff any remaining residue with a nail buffer.
- Wash your hands and apply cuticle oil or hand cream.
Q: How do I fix a chipped nail at home?
A: If you notice a small chip in your nail polish, you can try to fix it with some color polish and top coat.
- Clean the chipped area with some nail polish remover and a cotton swab.
- Apply a thin layer of color polish over the chip with a small brush or dotting tool.
- Let it dry for about 2 minutes.
- Apply a thin layer of top coat over the entire nail.
- Let If the chip is too big or noticeable, you might need to remove the polish and redo the nail.
Q: How do I prevent my nails from yellowing?
A: Yellow nails can be caused by various factors, such as smoking, nail fungus, or frequent use of dark-colored nail polish. To prevent your nails from yellowing, you can try the following tips:
- Wear a base coat before applying color polish. This will create a barrier between your nail and the pigment and prevent staining.
- Avoid using nail polish remover that contains acetone. This can dry out your nails and make them more prone to yellowing.
- Use a gentle nail buffer to remove any surface stains from your nails.
- Apply lemon juice or baking soda to your nails and leave it for a few minutes. These natural ingredients can help whiten your nails and remove any odors.
- Eat a balanced diet that includes foods rich in vitamin C, calcium, and zinc. These nutrients can help strengthen your nails and prevent discoloration.
Q: How do I create nail art at home?
A: Nail art is a fun way to express your creativity and personality with your nails. You can create nail art at home with some simple tools and techniques, such as:
- Nail stickers or decals. These are pre-made designs that you can stick on your nails after applying color polish. You can find them in various shapes, sizes, and themes, such as flowers, stars, animals, etc.
- Dotting tools or pens. These are tools that have a metal or plastic tip that can create small dots on your nails. You can use them to create patterns, flowers, animal prints, etc.
- Nail brushes. These are thin and fine brushes that can create lines, curves, swirls, etc. on your nails. You can use them to create stripes, plaid, geometric shapes, etc.
- Tape or stickers. These are items that you can use to create negative space or stencil effects on your nails. You can cut them into different shapes and place them on your nails before applying color polish. Then peel them off to reveal the design.
- Sponge or cotton swab. These are items that you can use to create gradient or ombre effects on your nails. You can dab them with different colors of polish and apply them on your nails with a light touch.
To create nail art at home, you will need some patience and practice. You can also look for inspiration online or in magazines and try to recreate your favorite designs. Have fun and experiment with different colors and styles!