 by
by Introduction
Nail art has taken the world by storm, allowing individuals to express their creativity and style through intricate designs and patterns. In this comprehensive guide, we’ll dive into the captivating world of nail art and explore three popular styles: marble, galaxy, and animal print manicures. These unique designs add a touch of individuality to your nails, and with the right techniques, you can achieve professional-quality results from the comfort of your home.
Marble Manicure
What is a Marble Manicure?
Marble manicures mimic the elegant, veined patterns of natural marble. The result is a luxurious and sophisticated nail art that complements any occasion.
How to Create a Marble Manicure
Achieving a marble manicure is easier than it appears. Follow these steps to transform your nails into marble masterpieces:
- Preparation: Begin with clean, well-manicured nails.
- Base Coat: Apply a clear base coat to protect your natural nails.
- Base Color: Choose a light-colored nail polish as your base, allowing the marble veins to stand out.
- Marble Effect: Drip a few drops of a contrasting nail polish color onto your nail.
- Swirl and Blend: Use a toothpick or a thin brush to gently swirl and blend the colors while they’re still wet.
- Top Coat: Finish with a clear top coat for a glossy finish and added durability.
Tips for a Stunning Marble Manicure
- Experiment with different color combinations for unique marble effects.
- Practice your swirling technique on a piece of paper before applying it to your nails.
- Don’t worry about perfection—marble patterns are naturally imperfect and beautiful.
Galaxy Manicure
What is a Galaxy Manicure?
Galaxy manicures capture the allure of the cosmos, with swirling colors, stars, and nebulae that evoke the mystery of outer space.
Creating a Galaxy Manicure
Turn your nails into a celestial canvas with these steps:
- Base Coat: Apply a dark, starry night-colored base coat.
- Galactic Colors: Using a sponge or brush, dab on various colors to create a galaxy effect.
- Stars and Accents: Add tiny white dots for stars and use a fine brush to create nebulae.
- Top Coat: Finish with a glossy top coat to enhance the celestial look.
Exploring the Universe of Galaxy Nails
- Experiment with different galaxy color palettes, from deep purples and blues to vibrant pinks and oranges.
- Add glitter for an extra dose of cosmic sparkle.
- Personalize your galaxy nails with your favorite constellations or celestial motifs.
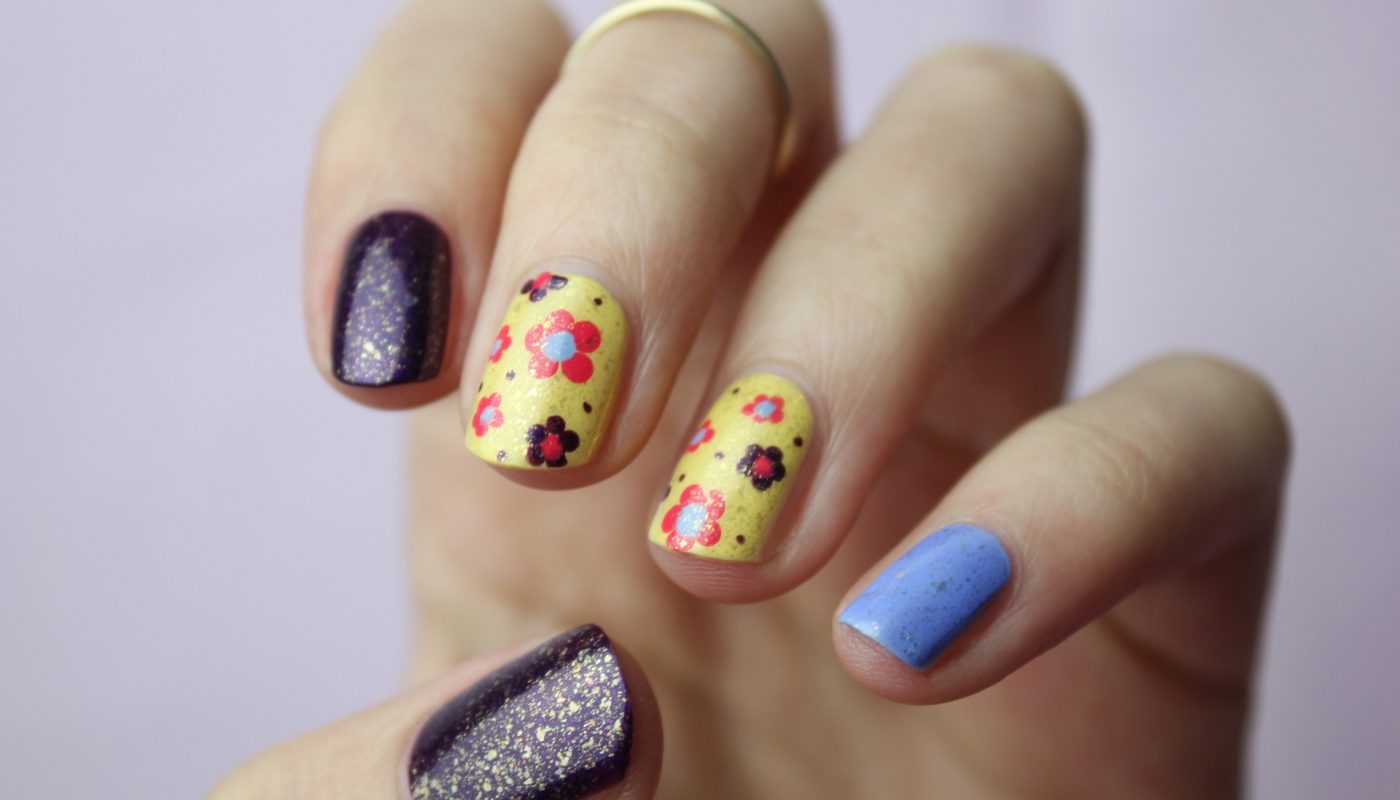
Animal Print Manicure
What is an Animal Print Manicure?
Animal print manicures draw inspiration from the wild, replicating the patterns of animals like leopards, zebras, and snakes.
Creating an Animal Print Manicure
Unleash your inner beast with these steps:
- Base Coat: Apply a solid-colored base coat that complements your chosen animal print.
- Animal Print: Use a thin brush or nail art pen to recreate the animal print pattern.
- Accents and Details: Add accents like dots, lines, or metallic touches for a personalized twist.
- Top Coat: Seal your design with a clear top coat for longevity.
Roar with Creativity
- Combine different animal prints on different nails for a wild, eclectic look.
- Experiment with color variations to create fantasy animal prints.
Tools and Materials
To excel in nail art, equip yourself with essential tools and materials:
- High-quality nail polishes in various colors.
- Fine brushes and dotting tools for precise designs.
- Nail polish remover and cleanup brushes for mistakes.
- Clear base and top coats for protection and longevity.
Tips for a Flawless Manicure
- Patience: Take your time with each step for the best results.
- Practice: Nail art improves with practice, so don’t be discouraged by early attempts.
- Sealing: Always seal your designs with a top coat to prevent chipping.
Exploring Your Creativity
Nail art is an evolving form of self-expression. Experiment with these styles, mix and match techniques, and embrace your inner nail artist. The possibilities are as boundless as your imagination.
Conclusion
Marble, galaxy, and animal print manicures are a testament to the limitless creativity that can be expressed through nail art. By following these step-by-step guides and experimenting with various designs, you’ll unveil a world of beauty at your fingertips.
FAQs
- Q: Can I use regular nail polish for these manicures, or do I need special nail art polishes?
A: You can use regular nail polish for these manicures. However, nail art polishes often come with fine brushes for intricate designs. - Q: Are there any shortcuts or easy-to-follow designs for beginners?
A: Start with simple designs and gradually progress to more intricate ones. There are many beginner-friendly tutorials online. - Q: How can I make my manicure last longer without chipping?
A: Apply a top coat to seal your design and touch up any chipped areas with nail polish as needed. - Q: What is the drying time for these nail art styles?
A: Drying times can vary, but it’s best to allow each layer to dry thoroughly before proceeding to the next step. - Q: Can I combine different nail art styles in one manicure?
A: Absolutely! Combining styles can result in unique and eye-catching nail art. Let your creativity run wild.