 by
by Nail art is a creative way of decorating your nails with various materials and tools. It can make your nails look more attractive, unique, and expressive. Whether you want to show off your personality, mood, or style, there is a nail art design that suits you. But how do you do nail art with stickers, stencils, gems, foils, etc.? In this article, we will show you how to use these different types of nail art materials and tools to create stunning nail art designs. We will also give you some tips and tricks on how to apply and remove them easily.
What is nail art and why it is popular
Nail art is the art of painting, drawing, or embellishing your nails with various colors, patterns, shapes, or textures. It can be done on natural nails or artificial nails. It can also be done at home or at a salon.
Nail art is popular because it can:
- Enhance your beauty and appearance: Nail art can make your nails look more beautiful and attractive. It can also complement your outfit, makeup, or accessories.
- Express your personality and mood: Nail art can show your personality and mood. You can choose a nail art design that reflects your interests, hobbies, preferences, or emotions.
- Unleash your creativity and imagination: Nail art can unleash your creativity and imagination. You can experiment with different colors, patterns, shapes, or textures. You can also mix and match different materials and tools.
- Have fun and relax: Nail art can be fun and relaxing. You can enjoy the process of creating your own nail art design. You can also share your nail art design with your friends or family.
What are the different types of nail art materials and tools
There are many types of nail art materials and tools that you can use to create different nail art designs. Some of the most common ones are:
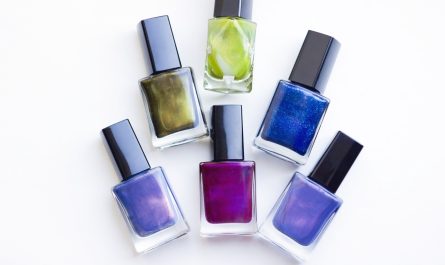
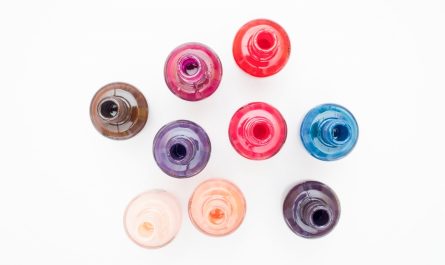
- Nail polish: This is the basic material that you need for any nail art design. It is a liquid product that you apply on your nails to give them color and shine. There are many types of nail polish, such as regular polish, gel polish, matte polish, glitter polish, etc.
- Nail stickers: These are pre-made adhesive decals that you stick on your nails to give them a pattern or texture. There are many types of nail stickers, such as floral stickers, animal stickers, geometric stickers, etc.
- Nail stencils: These are thin sheets of plastic or paper that have cut-out shapes or patterns that you place on your nails to create a design. You can use them with nail polish or other materials to fill in the gaps.
- Nail gems: These are small pieces of crystals or rhinestones that you attach on your nails to give them sparkle and dimension. There are many types of nail gems,such as round gems, square gems, star gems, etc.
- Nail foils: These are thin sheets of metallic or holographic material that you apply on your nails to give them a shiny or iridescent effect. There are many types of nail foils, such as gold foils, silver foils, rainbow foils, etc.
- Other materials and tools: There are also other materials and tools that you can use for nail art, such as nail brushes, dotting tools, striping tapes, stamps, etc.
How to Do Nail Art with Stickers
Nail stickers are one of the easiest and fastest ways to do nail art. They can give your nails a variety of patterns and textures without much effort. Here is how to do nail art with stickers:
- Step 1: Prepare your nails. Clean and shape your nails as usual. Apply a base coat to protect your nails and help the stickers adhere better.
- Step 2: Choose your stickers. Pick the stickers that you want to use for your nail art design. You can use one type of sticker or mix and match different types of stickers. You can also cut or trim the stickers to fit your nails.
- Step 3: Apply your stickers. Peel off the stickers from their backing and place them on your nails. Press them firmly and smooth out any air bubbles or wrinkles. You can use tweezers or a toothpick to help you position the stickers.
- Step 4: Seal your stickers. Apply a top coat over your stickers to seal them and make them last longer. You can also add some extra shine or glitter if you want.
Some examples of nail art designs with stickers are:
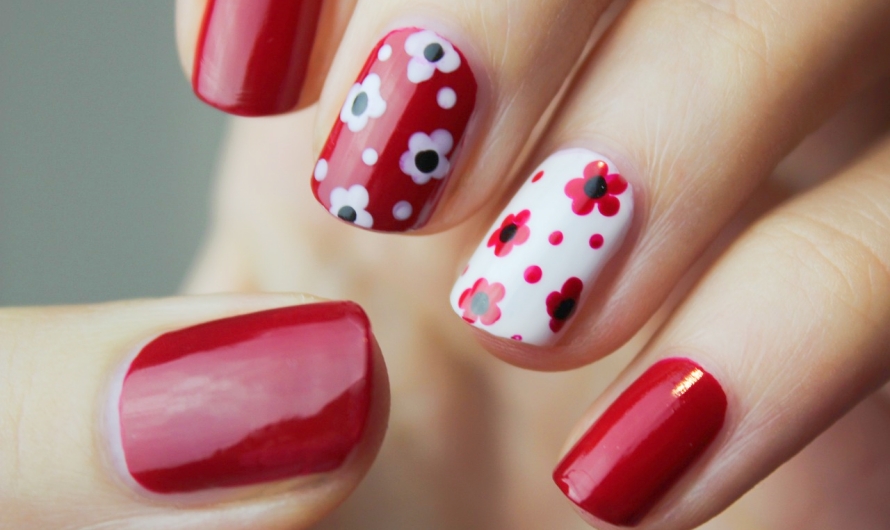
- Floral nails: Use floral stickers to create a garden-inspired nail art design. You can use different colors and sizes of flowers to create a contrast or a gradient effect.
- Animal print nails: Use animal print stickers to create a wild and exotic nail art design. You can use different types of animal prints, such as leopard, zebra, snake, etc.
- Geometric nails: Use geometric stickers to create a modern and minimalist nail art design. You can use different shapes and patterns, such as triangles, squares, circles, stripes, etc.
Tips and tricks for applying and removing nail stickers
Here are some tips and tricks that can help you apply and remove nail stickers more easily:
- To apply nail stickers more smoothly, you can use a hair dryer or a warm towel to heat them up slightly before sticking them on your nails. This can make them more flexible and adhesive.
- To remove nail stickers more easily, you can soak your nails in warm water or nail polish remover for a few minutes before peeling them off gently. This can loosen the glue and prevent damage to your nails.
How to Do Nail Art with Stencils
Nail stencils are another simple and quick way to do nail art. They can give your nails a variety of designs and effects without much skill. Here is how to do nail art with stencils:
- Step 1: Prepare your nails. Clean and shape your nails as usual. Apply a base coat and a base color of your choice. Let them dry completely.
- Step 2: Choose your stencils. Pick the stencils that you want to use for your nail art design. You can use one type of stencil or mix and match different types of stencils. You can also make your own stencils by cutting out shapes or patterns from plastic or paper.
- Step 3: Apply your stencils. Place the stencils on your nails and secure them with tape or adhesive. Make sure there are no gaps or overlaps between the stencils and your nails.
- Step 4: Paint over your stencils. Use a different color of nail polish or another material to paint over the stencils. You can use a sponge, a brush, or a spray bottle to apply the paint. Be careful not to apply too much paint or it will bleed under the stencils.
- Step 5: Remove your stencils. Peel off the stencils carefully while the paint is still wet. Do not wait until the paint is dry or it will stick to the stencils and ruin your design.
- Step 6: Seal your design. Apply a top coat over your design to seal it and make it last longer.
Some examples of nail art designs with stencils are:
- Gradient nails: Use gradient stencils to create an ombre effect on your nails. You can use different colors of nail polish to create a gradient from light to dark or from one color to another.
- Lace nails: Use lace stencils to create a delicate and feminine effect on your nails. You can use white or black nail polish over a contrasting base color to create a lace pattern.
- Marble nails: Use marble stencils to create a realistic and elegant effect on your nails. You can use different colors of nail polish and a sponge to create a marble texture.
Tips and tricks for creating and using nail stencils
Here are some tips and tricks that can help you create and use nail stencils more effectively:
- To create nail stencils more easily, you can use a hole puncher, a craft knife, or a pair of scissors to cut out shapes or patterns from plastic or paper. You can also use stickers, tapes, or band-aids as stencils.
- To use nail stencils more neatly, you can use a thin layer of liquid latex or peel-off base coat around your nails to protect your skin from the paint. You can also use a cotton swab or a nail polish remover pen to clean up any mistakes.
How to Do Nail Art with Gems
Nail gems are another easy and fast way to do nail art. They can give your nails a sparkly and glamorous look without much effort. Here is how to do nail art with gems:
- Step 1: Prepare your nails. Clean and shape your nails as usual. Apply a base coat and a base color of your choice. Let them dry completely.
- Step 2: Choose your gems. Pick the gems that you want to use for your nail art design. You can use one type of gem or mix and match different types of gems. You can also choose different colors, sizes, and shapes of gems.
- Step 3: Apply your gems. Use a dotting tool, a toothpick, or a pair of tweezers to pick up the gems and place them on your nails. You can use a drop of nail glue, clear nail polish, or top coat to secure the gems on your nails. You can also use a nail art pen or a brush to draw patterns or outlines around the gems.
- Step 4: Seal your gems. Apply a top coat over your gems to seal them and make them last longer.
Some examples of nail art designs with gems are:
- Bling nails: Use a lot of gems to cover your entire nails or create a gradient effect. You can use different colors and sizes of gems to create a dazzling and eye-catching look.
- Accent nails: Use a few gems to accentuate one or two nails on each hand. You can use different shapes and patterns of gems to create a contrast or a harmony with your base color.
- French tips: Use gems to create a french tip effect on your nails. You can use different colors and shapes of gems to create a classic or a modern look.
Tips and tricks for applying and removing nail gems
Here are some tips and tricks that can help you apply and remove nail gems more easily:
- To apply nail gems more precisely, you can use a dotting tool, a toothpick, or a pair of tweezers to pick up the gems and place them on your nails. You can also use a magnifying glass or a lamp to see the details better.
- To remove nail gems more easily, you can soak your nails in warm water or nail polish remover for a few minutes before gently pushing them off with an orange stick or a cuticle pusher. You can also use a cotton pad soaked in nail polish remover to rub them off.
How to Do Nail Art with Foils
Nail foils are another simple and quick way to do nail art. They can give your nails a shiny and iridescent effect without much skill. Here is how to do nail art with foils:
- Step 1: Prepare your nails. Clean and shape your nails as usual. Apply a base coat and let it dry completely.
- Step 2: Choose your foils. Pick the foils that you want to use for your nail art design. You can use one type of foil or mix and match different types of foils. You can also choose different colors, patterns, and textures of foils.
- Step 3: Apply your foils. Cut the foils into small pieces that fit your nails. Apply a thin layer of foil glue or clear nail polish on your nails and wait until it becomes tacky. Press the foils on your nails and rub them gently with your finger or an orange stick. Peel off the foils carefully and discard the excess.
- Step 4: Seal your foils. Apply a top coat over your foils to seal them and make them last longer.
Some examples of nail art designs with foils are:
- Galaxy nails: Use black or dark blue foil as the base color and add different colors of foil on top to create a galaxy effect on your nails. You can also add some white dots or stars with a dotting tool or a brush.
- Marble nails: Use white or light gray foil as the base color and add different colors of foil on top to create a marble effect on your nails. You can also use a toothpick or a needle to swirl the colors together.
- Holographic nails: Use any color of foil as the base color and add holographic foil on top to create a holographic effect on your nails. You can also cut the holographic foil into different shapes or patterns to create more interest.
Tips and tricks for applying and removing nail foils
Here are some tips and tricks that can help you apply and remove nail foils more effectively:
- To apply nail foils more smoothly, you can use foil glue instead of clear nail polish as it can provide better adhesion and less wrinkling. You can also use an iron or a hair dryer to heat up the foils slightly before applying them on your nails.
- To remove nail foils more easily, you can use the same method as removing nail polish. You can use a cotton pad soaked in nail polish remover and wrap it around your nails for a few minutes before wiping them off. You can also use a foil wrap and a cotton ball soaked in nail polish remover and wrap it around your nails for a few minutes before peeling them off.
Conclusion
Nail art is a fun and creative way of decorating your nails with different materials and tools. By using stickers, stencils, gems, foils, etc., you can create various nail art designs that suit your style, personality, and mood. Whether you want to create a simple or a complex nail art design, you can follow the steps and tips that we have provided in this article. So go ahead and try out different nail art materials and tools and have fun with your nails!
FAQs
- Q: How can I learn more about nail art?
- A: There are many ways that you can learn more about nail art, such as watching online tutorials, reading blogs or magazines, taking online courses, or joining online communities. You can also visit a nail salon or a nail art studio and ask for advice or inspiration from the professionals.
- Q: How can I make my nail art more unique and original?
- A: There are some ways that you can make your nail art more unique and original, such as using your own creativity and imagination, mixing and matching different materials and tools, adding personal touches or details, or customizing your nail art according to your preferences.
- Q: How can I take care of my nails after doing nail art?
- A: There are some ways that you can take care of your nails after doing nail art, such as moisturizing your nails and cuticles regularly, avoiding biting or picking your nails, wearing gloves when doing household chores, or using a nail strengthener or a nail oil.
- Q: How can I remove my nail art without damaging my nails?
- A: There are some ways that you can remove your nail art without damaging your nails, such as using gentle and acetone-free nail polish remover, soaking your nails in warm water or oil before removing the nail art, or using a wooden stick or a rubber hoof stick to push off the nail art.
- Q: How can I save money on doing nail art?
- A: There are some ways that you can save money on doing nail art, such as doing it yourself at home instead of going to a salon, using affordable and quality materials and tools, reusing or recycling your materials and tools, or doing simple and easy nail art designs.