 by
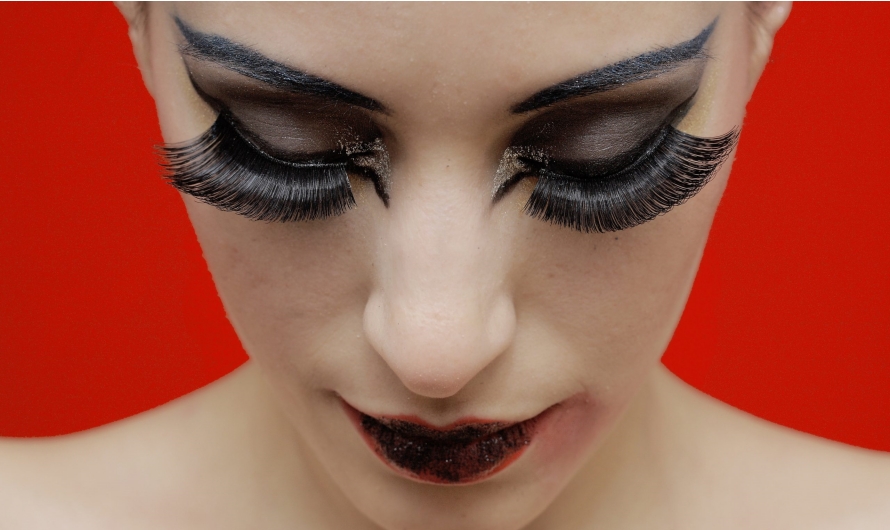
by False eyelashes are artificial lashes that are attached to your natural lashes or eyelids with glue or magnets. They are designed to enhance your eye makeup, make your eyes look bigger, brighter, and more defined, and give you a glamorous and stunning look. Whether you want to add some length, volume, curl, or drama to your lashes, false eyelashes can help you achieve your desired effect. However, applying false eyelashes can also be tricky and challenging for beginners, especially with so many options, tools, tips, and tutorials available in the market. How do you know which false eyelashes to choose, how to apply them, how to blend them, and how to remove them? In this article, we will guide you through the basics of applying false eyelashes and help you master this skill in no time.
How to choose the right false eyelashes for your eye shape and size
One of the most important factors to consider when choosing false eyelashes is your eye shape and size. Your eye shape and size determine which style and length of false eyelashes will suit you best and flatter your features. Here are some tips on how
How to determine your eye shape and size
Your eye shape and size are the outline and proportion of your eyes as seen from the front. There are six common eye shapes: almond, round, hooded, monolid, downturned, and upturned. There are also three common eye sizes: small, medium, and large. To determine your eye shape and size, you can use one of these methods:
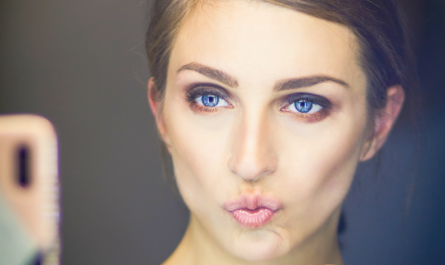
- Method 1: Use a mirror or a camera to take a front-facing photo of your eyes without any makeup, hair, or accessories. Compare your eyes with these images
- Method 2: Use a measuring tape or a ruler to measure the width and height of your eyes. Compare these measurements with these guidelines:
- Almond: Your eyes are slightly pointed at the inner and outer corners and have a visible crease. Your eye width is about twice as long as your eye height.
- Round: Your eyes are circular and have a visible crease. Your eye width and height are almost equal.
- Hooded: Your eyes have a fold of skin that covers your crease and makes your eyelids look smaller. Your eye width is about twice as long as your eye height.
- Monolid: Your eyes have no visible crease and have a flat surface. Your eye width is about twice as long as your eye height.
- Downturned: Your eyes have a slight downward tilt at the outer corners. Your eye width is about twice as long as your eye height.
- Upturned: Your eyes have a slight upward tilt at the outer corners. Your eye width is about twice as long as your eye height.
- Small: Your eyes are smaller than the width of your nose bridge.
- Medium: Your eyes are about the same size as the width of your nose bridge.
- Large: Your eyes are larger than the width of your nose bridge.
How to choose the right false eyelashes for different eye shapes and sizes
Once you know your eye shape and size, you can use it as a guide to choose the right false eyelashes for you. Here are some general guidelines on how to choose the right false eyelashes for different eye shapes and sizes:
- For almond eyes, opt for any style of false eyelashes that follows the natural shape of your eyes. You can choose from natural, wispy, flared, or dramatic lashes depending on your preference and occasion. You can also choose from short, medium, or long lashes depending on your eye size.
- For round eyes, opt for winged or cat-eye style of false eyelashes that elongates and lifts your eyes. You can choose from flared, tapered, or criss-cross lashes depending on your preference and occasion. You can also choose from medium or long lashes depending on your eye size.
- For hooded eyes, opt for curled or arched style of false eyelashes that opens up and defines your eyes. You can choose from wispy, feathered, or spiky lashes depending on your preference and occasion. You can also choose from short or medium lashes depending on your eye size.
- For monolid eyes, opt for voluminous or layered style of false eyelashes that creates some shape and dimension to your eyes. You can choose from dense, fluffy, or clustered lashes depending on your preference and occasion. You can also choose from medium or long lashes depending on your eye size.
- For downturned eyes, opt for lifted or curled style of false eyelashes that corrects and balances your eyes. You can choose from flared, tapered, or criss-cross lashes depending on your preference and occasion. You can also choose from medium or long lashes depending on your eye size.
- For upturned eyes, opt for balanced or symmetrical style of false eyelashes that harmonizes and enhances your eyes. You can choose from natural, wispy, flared, or dramatic lashes depending on your preference and occasion. You can also choose from short, medium, or long lashes depending on your eye size.
- For small eyes, opt for lengthening or enhancing style of false eyelashes that makes your eyes look bigger and brighter. You can choose from wispy, flared, or tapered lashes depending on your preference and occasion. You can also choose from long lashes to create some contrast and drama.
- For medium eyes, opt for any style of false eyelashes that suits your eye shape and preference. You can choose from natural, wispy, flared, dramatic, feathered, spiky, dense, fluffy, or clustered lashes depending on your preference and occasion. You can also choose from short, medium, or long lashes depending on your eye shape and size.
- For large eyes, opt for thickening or defining style of false eyelashes that makes your eyes look more defined and balanced. You can choose from dense, fluffy, or clustered lashes depending on your preference and occasion. You can also choose from short or medium lashes to create some harmony and proportion.
How to trim and measure your false eyelashes
After choosing the right false eyelashes for your eye shape and size, you need to trim and measure them to fit your eyes perfectly. Here are some tips on how to trim and measure your false eyelashes:
- To trim your false eyelashes, use a pair of scissors or a lash trimmer to cut off any excess length or width from the outer or inner corner of the lash band. Make sure to cut off only a small amount at a time and check the fit before cutting more. Avoid cutting off too much or too close to the lash hairs as this can ruin the shape and style of the lashes.
- To measure your false eyelashes, use a pair of tweezers or your fingers to hold the lash band against your upper lash line and see how it fits. Make sure the lash band is aligned with the inner and outer corner of your eye and does not extend beyond them. If the lash band is too long or too wide, trim it accordingly until it fits comfortably and securely.
How to apply false eyelashes step by step
After trimming and measuring your false eyelashes, you are ready to apply them to your eyes. Here are some tips on how to apply false eyelashes step by step:
How to prepare your natural eyelashes and eyelids
Before applying your false eyelashes, you need to prepare your natural eyelashes and eyelids to ensure a smooth and easy application. Here are some tips on how to prepare your natural eyelashes and eyelids:
- Curl your natural eyelashes with an eyelash curler to lift them up and create some space for the false eyelashes. Hold the curler at the base of your lashes for a few seconds and then move it up to the middle and tip of your lashes for a few more seconds. Repeat this process until you achieve your desired curl.
- Apply a thin coat of mascara to your natural eyelashes to add some color and volume and blend them with the false eyelashes later. Use a waterproof or smudge-proof mascara to prevent any flaking or smearing throughout the day.
- Cleanse and moisturize your eyelids to remove any dirt, oil, or makeup residue that can interfere with the glue or magnet adhesion. Use a gentle cleanser and a hydrating moisturizer that are suitable for your skin type and sensitivity. Avoid using any oil-based products that can weaken the glue or magnet hold.
- Apply a thin layer of eyeliner to your upper lash line to create some definition and hide any gaps or mistakes later. Use a black or brown eyeliner that matches your false eyelashes and your eye makeup. You can use a pencil, liquid, gel, or powder eyeliner depending on your preference and skill level.
How to apply glue and wait for it to get tacky
If you are using glue-on false eyelashes, you need to apply glue and wait for it to get tacky before applying them to your eyes. Here are some tips on how to apply glue and wait for it to get tacky:
- Use a high-quality lash glue that is safe, hypoallergenic, waterproof, and long-lasting. Avoid using any cheap or expired lash glue that can cause irritation, infection, or allergic reaction.
- Apply a thin and even layer of glue along the lash band using the applicator or a toothpick. Make sure to cover the entire lash band and add a little extra glue on the ends for extra security. Avoid applying too much or too little glue as this can cause the lashes to fall off or stick together.
- Wait for about 30 seconds or until the glue becomes tacky and sticky. You can test the tackiness by gently touching the lash band with your finger or blowing on it lightly. If the glue is still wet or runny, wait for a few more seconds. If the glue is dry or hard, reapply some more glue.
How to apply false eyelashes with tweezers or fingers
After applying glue and waiting for it to get tacky, you are ready to apply false eyelashes with tweezers or fingers. Here are some tips on how to apply false eyelashes with tweezers or fingers:
- Use a pair of tweezers or your fingers to hold the lash band in the middle and gently place it on your upper lash line as close as possible to your natural lashes. Make sure the lash band is aligned with the inner and outer corner of your eye and does not extend beyond them.
- Use another pair of tweezers or your fingers to adjust the position and angle of the lash band until it fits comfortably and securely on your eye. Press down the lash band from the center to the ends with gentle pressure to adhere it to your skin.
- Use a pair of tweezers or your fingers to gently press together your natural lashes and false eyelashes to blend them together and create a seamless look.
How to blend and adjust your false eyelashes
After applying false eyelashes with tweezers or fingers, you need to blend and adjust them to make them look more natural and comfortable. Here are some tips on how
How to curl and mascara your false eyelashes and natural eyelashes
To blend and adjust your false eyelashes, you can curl and mascara them together with your natural eyelashes to create some lift and volume and make them look more unified and consistent. Here are some tips on how to curl and mascara your false eyelashes and natural eyelashes:
- Curl your false eyelashes and natural eyelashes together with an eyelash curler to create some curl and shape. Hold the curler at the base of your lashes for a few seconds and then move it up to the middle and tip of your lashes for a few more seconds. Repeat this process until you achieve your desired curl.
- Apply a thin coat of mascara to your false eyelashes and natural eyelashes together to add some color and volume and make them look more blended and balanced. Use a waterproof or smudge-proof mascara to prevent any flaking or smearing throughout the day.
How to fix any gaps or mistakes with eyeliner or eyeshadow
To blend and adjust your false eyelashes, you can also fix any gaps or mistakes with eyeliner or eyeshadow to create some definition and hide any imperfections. Here are some tips on how to fix any gaps or mistakes with eyeliner or eyeshadow:
- Use a black or brown eyeliner that matches your false eyelashes and your eye makeup to fill in any gaps or spaces between your false eyelashes and natural eyelashes or between your false eyelashes and lash line. You can use a pencil, liquid, gel, or powder eyeliner depending on your preference and skill level.
- Use a black or brown eyeshadow that matches your false eyelashes and your eye makeup to smudge or blend any harsh lines or edges of your false eyelashes or lash glue. You can use a small brush or a sponge applicator to apply the eyeshadow along the lash line and the lash band.
How to make your false eyelashes look more natural and comfortable
To blend and adjust your false eyelashes, you can also make them look more natural and comfortable by trimming, bending, or fluffing them. Here are some tips on how to make your false eyelashes look more natural and comfortable:
- Trim your false eyelashes if they are too long or too thick for your eyes. Use a pair of scissors or a lash trimmer to cut off any excess length or width from the outer or inner corner of the lash band. Make sure to cut off only a small amount at a time and check the fit before cutting more. Avoid cutting off too much or too close to the lash hairs as this can ruin the shape and style of the lashes.
- Bend your false eyelashes if they are too stiff or too straight for your eyes. Use a pair of tweezers or your fingers to gently bend the lash band in a U-shape or a C-shape. This will make the lash band more flexible and curved and fit better on your eye shape and size.
- Fluff your false eyelashes if they are too flat or too sparse for your eyes. Use a lash comb or a spoolie brush to gently comb through the lash hairs from the base to the tip. This will make the lash hairs more fluffy and voluminous and create some texture and movement.
How to remove and care for your false eyelashes
After wearing your false eyelashes for a day or a night, you need to remove and care for them properly to ensure their longevity and quality. Here are some tips on how to remove and care for your false eyelashes:
How to remove your false eyelashes gently and safely
To remove your false eyelashes, you need to do it gently and safely to avoid any damage or injury to your eyes or lashes. Here are some tips on how to remove your false eyelashes gently and safely:
- Use a cotton pad or a Q-tip soaked in an oil-based makeup remover or a lash glue remover to gently dissolve the glue or magnet hold. Hold the cotton pad or Q-tip on your lash line for a few seconds and then gently slide it along the lash band from the inner to the outer corner of your eye. Repeat this process until the lash band comes off easily and painlessly.
- Use a pair of tweezers or your fingers to gently peel off the lash band from your eye. Start from the outer corner of your eye and work your way inward. Avoid pulling or tugging on the lash hairs as this can cause them to fall off or break.
- Use a cotton pad or a Q-tip soaked in a gentle cleanser or water to gently wipe off any residue or makeup from your eyelids and lashes. Be careful not to rub or irritate your eyes or lashes.
How to clean and store your false eyelashes properly
To care for your false eyelashes, you need to clean and store them properly to maintain their hygiene and shape. Here are some tips on how to clean and store your false eyelashes properly:
- Use a pair of tweezers or your fingers to gently remove any glue or magnet residue from the lash band. You can also use a cotton pad or a Q-tip soaked in an oil-based makeup remover or a lash glue remover to gently dissolve any stubborn glue or magnet residue.
- Use a lash comb or a spoolie brush to gently comb through the lash hairs from the base to the tip. This will remove any dust, dirt, or mascara from the lashes and make them look more clean and fresh.
- Use a cotton pad or a Q-tip soaked in an alcohol-based sanitizer or a lash cleaner to gently sanitize the lash band and hairs. This will kill any bacteria, germs, or fungi that can cause infection, irritation, or allergic reaction.
- Use a tissue paper or a paper towel to gently pat dry the lash band and hairs. Avoid rubbing or squeezing the lashes as this can damage their shape and style.
- Use the original packaging or a lash case to store your false eyelashes in a cool, dry, and dark place. Avoid exposing them.